Do you want to access your Comcast account on Windows 10 computer? If yes, then keep following this small article till the end. Windows 10 has an inbuilt email app, which you can use to configure your Comcast email account.
Steps to Configure Comcast Email in Windows 10 Mail
- Open the Windows 10 Mail app first.
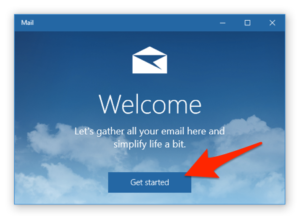
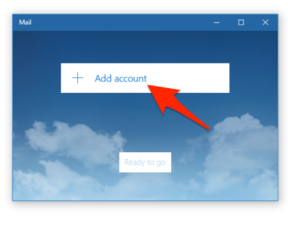
- If this is the first time you are configuring an email then click “Get Started” then tap on “Add Account”
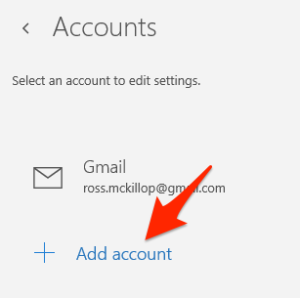
- If, in case, an account exists already, then, click on settings, choose an account, and select “Add Account”
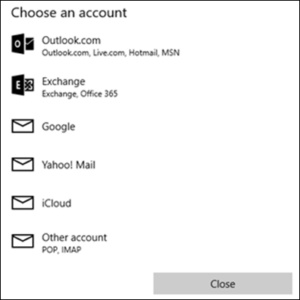
- You will be asked to choose an account; select “Another account”.
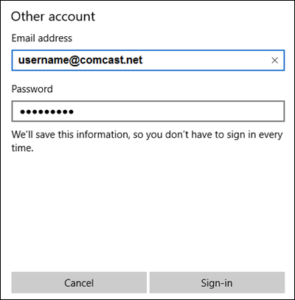
- In the email address field, enter your Comcast email address.
- In the password field, enter your Comcast password.
- Press the “Sign in” button.
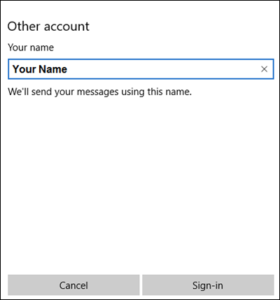
- Provide your name.
- Press the Sign-in button again to finish.
- You have successfully configured your Comcast email account with Windows 10.
If the automatic sign-in doesn’t work then you will have to reconfigure the account manually.
How to Reconfigure the Comcast Account Manually
- Open the Windows 10 Mail app first.
- If this is the first time you are configuring an email then click “Get Started” then tap on “Add Account”
- If an account exists already, then, click on settings, choose the account, and select “Add Account”
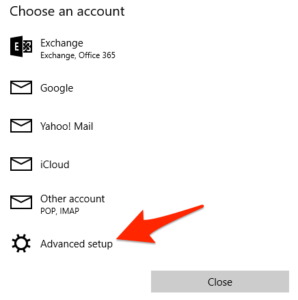
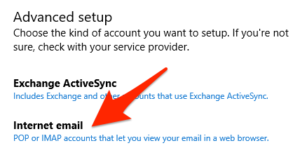
- You will be asked to choose an account; select “Advanced setup”
- Now choose “Internet email”
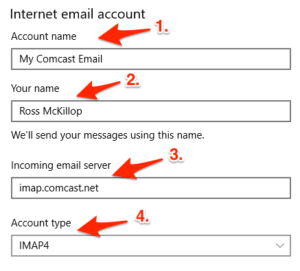
- Update the following information:
- Account Name: any name you like for example, Your Comcast Email
- Your Name: Your First and last name.
- Incoming Email Server: imap.comcast.net
- Account type: IMAP4
- In the username field, type the Comcast username. It is usually the first part of the email address. For example, if your Comcast email address is [email protected] then your username must be tinagrey2009
- Your password is the same password used to access the Comcast account.
- In the Outgoing (SMTP) server, type smtp.comcast.net

- Now, check all the boxes which come your way.
- The outgoing server requires authentication
- Use the same username and password for sending email
- Require SSL for incoming emails.
- Require SSL for outgoing email.
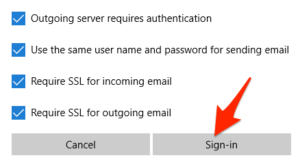
- Press the Sign-in button followed by the Done button.
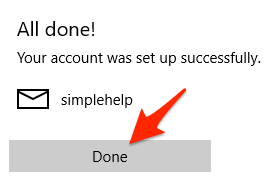
You have successfully configured your Comcast email account with the Windows 10 Mail app.

Now, try to send or receive an email. If the problem persists then follow the steps mentioned above from the beginning or attentively call our certified technicians on our toll-free number of Comcast email customer service and get instant support.
o gosh I have no clue about all this. I just know I bought a new computer ad want to transfer emails on old computer to new one. I have set up windows 10 mail on new one but how do I get old ones off old computer